
[ad_1]
Because of sites like Instagram, aquascaping is everything these days, and if you want to create a great saltwater aquascape you have to start with great-looking materials. Gone are the days of sloping rock walls with corals displayed like fruits on a market stall, rock falls, and bolder placed precariously on top of bolder. For now, we have the rock, the cement, and the inspiration to create a scape that benefits your animals while looking great, and natural, at the same time.

Getting started with Reef Tank Aquascaping
All reef rocks are not made the same and they can vary from wild collected live rock to mined limestone rocks, to resin, ceramic, and more. We don’t use the rock for biological filtration anymore, there are several high-tech media to take care of that, so instead, we should select rocks that look like a natural piece of the reef while also allowing for coral placement, freedom of water flow, hiding, and grazing opportunities for your chosen fish.
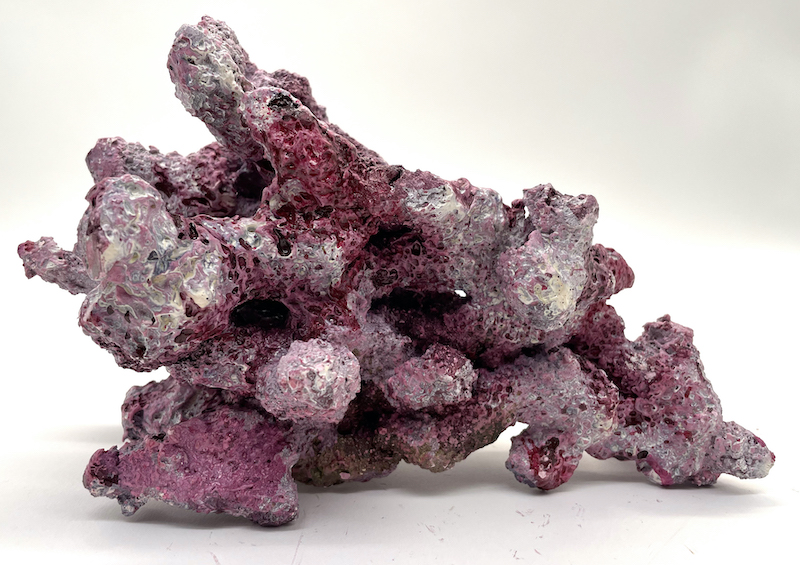
We have used every type of “reef rock” over the years from manmade to natural, white, to purple, but if you want to hit the ground running pay more and opt for rocks that are already pink and purple in color, and look like they are covered in calcareous algae. The issue with white rock is that like all dead rocks these days, it goes through the ugly phase of brown diatoms, red cyanobacteria, and stringy dinoflagellates. Purple rock does too but seeing as the “ugly phase” can last six months or more while new reef tanks biologically bed in, that’s a long time to sit and watch your tank in a mess. Clear the nuisance algae and the first algae your white surfaces will then grow will be green ones. Better for the system than brown and red, but ugly nevertheless, and a year into your dream tank you, and your guests, may be wondering like your very own piece of reef doesn’t look like anything in the brochure. Pay a bit more, get the shapes and importantly the color that you want, and it will pay dividends. This could be a ten-year project after all.
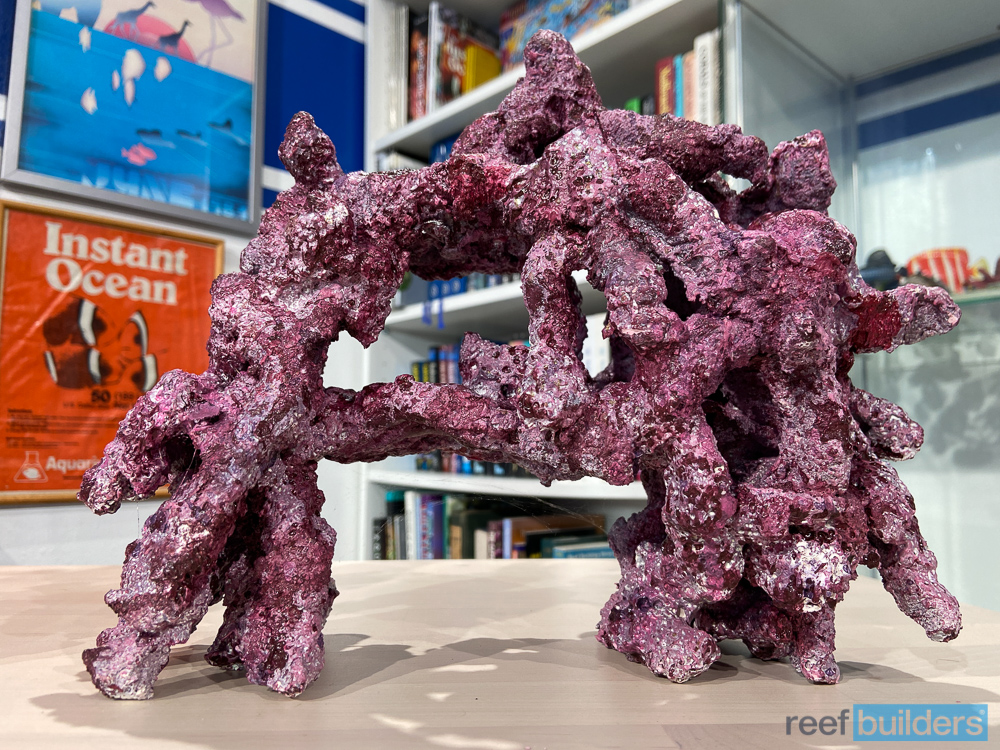
Next is to try to buy from the same brand or set of rocks, so that the texture, shapes, and colors all match from day one and all age and mature together. One white rock and one purple rock is not a good look, and there is branch rock with V shapes that look like a child made them, and then there is branch rock, that looks like the most pristine reef structure plucked straight out of Fiji. Again, choose the latter, and if you’re like us a really nicely shaped piece of rock, and the structure you make out of it, can be as nice as some of the hard coral skeletal forms that make up the reefs in nature.
In aquascaping more is more. By that, we mean that creating a modern, negative space scape is one thing (and beneficial in many ways,) but if you want your rock creation to be visually impactful from a distance you need to use some large pieces. Got a hundred-gallon tank? Invest in some 18” wide plates, 18” wide arches, and 18-24” long branches. Be brave and stack them so that they create natural-looking overhangs and aces, and natural places to place corals on top, where they will receive light and flow. Use acrylic rods, zip ties, reef cement, and epoxy to create a mini reef in your living room, and using dry rock and you can do it all away from your tank, and take days or even weeks to get it right.

Set up a cardboard box or build a light wooden frame with the same dimensions as your tank, but no front panel. There you can create, dismantle and recreate as much as you like with no fear of rock falls, scratching, or cracking the tank. Use the Golden Ratio, also known as the rule of two-thirds in artistry. Mark out two-thirds along the tank and two-thirds high, and that point will be your main focal point and the point that naturally draws the eye of everyone who gazes upon the tank in the future. Hard corals complicate things by growing their own hardscape, so if you’re going to place a coral pride of place in that sweet spot, place the rock to support several inches lower to accommodate that perfect placement and future growth. Epoxy works so much better if pushed into the rough surfaces of dry rock and left to dry naturally, and if you haven’t tried quick-drying reef cement before now is your time. Get the consistency right and it can literally set like concrete, giving you peace of mind that your gravity-defying rocks will stay exactly where you stuck them for years to come.
Seven reef tank aquascaping fundamentals
- Choose the best most premium shapes like plates, arches, and branches
- Choose purple colored rock over white if you can afford it
- Invest in large/very large pieces for the most dramatic visual effect
- Use the Golden Ratio to help you place your rockwork
- Create the scape dry, away from the tank for safety, and practice
- Use cement or epoxy to set your rockscape rock-hard
- Check out Tropic Eden Morocca Rock by Premium Aquatics.
[ad_2]
Source by [author_name]
Related Posts

An Interview With Aquascaper Jack Fryer
[ad_1] Hey all,Welcome to our first interview with avid aquascaper,…

Care, Lifespan, Tank Mates, Size & More
[ad_1] Because of their stunning appearance, alien betta fish are…
